
In the past, people may use to store their data on computer desktop or local hard drive. Actually, it is a really not safe for you to store data locally, because your data are always facing the risk of system crash, hardware failure, hacker attack, natural disaster, theft and so on.
Some users are aware of this problem, so, they choose to back up their data from a local computer to an external disk, USB, etc. with a backup software. However, physical storage location like external hard drive are also facing the risks of loss, theft, damage, etc.
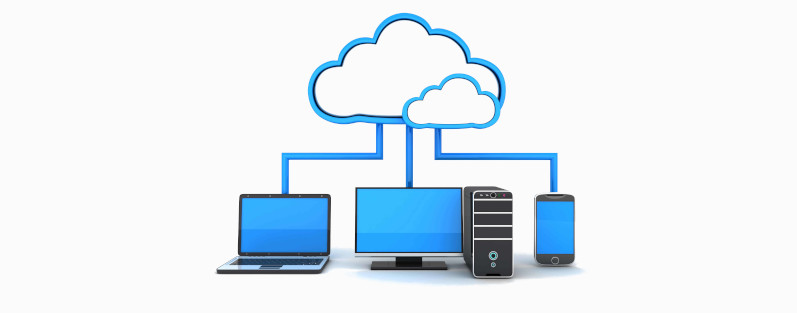
Therefore, more and more users choose to back up their data to a location that far away from their local computer and they don’t need to buy any physical tools. Nowadays, cloud server has been one of the best choices for data storage.
What’s the benefits of backing up files to cloud?
As mentioned above, one of the benefits of backing up files to cloud is that cloud server can keep your data far away from local computer and avoid unexpected things. With the data backups in cloud, you don’t need to worry about data loss and whenever you need your data, you can restore them from cloud easily.
Another important reasons for backing up files to cloud is that cloud offer bigger storage space than physical storage solutions like external hard drive, USB and so on. Generally, cloud servers can provide thousands of GB or even unlimited backup space. What’s more, the pricing of cloud storage space is affordable for most users.
Cloud storage vs. cloud backup: which one to choose?
To back up files to cloud server, both cloud storage service and cloud backup service can offer help. Although cloud storage is designed to supplement the hard drive space and enable you access and edit files from different devices in an easier way, cloud backup is designed to help you restore files when data is lost, they all offers a cloud server to store your data or backups.
If you want to back up files to cloud server for data protection but don’t know which kind of cloud service suits you best, you are suggested to choose cloud backup service. Compared with cloud storage, cloud backup service takes the protection of your data very seriously.
Generally, cloud backup service always encrypts your data during transmission and storage. But for most cloud storage services, your files will be encrypted on the server side only, which reduces the security of the data transmission process.
Which cloud server should you back up files to?
There are many cloud backup service that offers secure cloud server and different advantages. Which cloud backup service should you choose and which cloud server should your back up files to? If you have no ideas, you can try CBackup to back up your files to CBackup Cloud.
CBackup is a reliable and professional cloud backup service for Windows 10, 8.1, 8, 7, XP. It offers a secure and stable cloud server called CBackup Cloud to users. With its easy to use desktop client of CBackup, you can easily backup files from your Windows PCs to CBackup Cloud.
As for the security, CBackup applies 256-bit AES Encryption in data transfer so that your data will not be tampered, blocked or cracked. As for backup method, it takes incremental backup methods to save your backup space. As for features, it offers scheduled backup, file filter features and so on to help you improve backup efficiency.
How to back up files to cloud with CBackup step by step?
According to the contents above, you must know the benefits of backing up files to cloud and know the benefits of CBackup. If you decide to back up files to CBackup Cloud, you can follow the steps below to use CBackup with ease:
Step 1. Download CBackup app on your computer, install it according to the instruction.
Step 2. Run the CBackup app. You will see a New to CBackup? Create an account > link on the interface. Click this link and create your CBackup account on the web page.
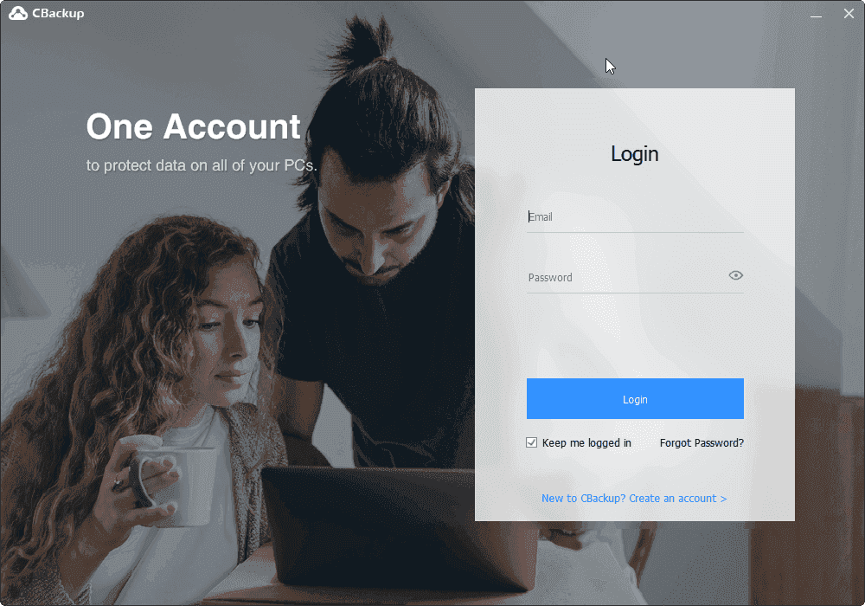
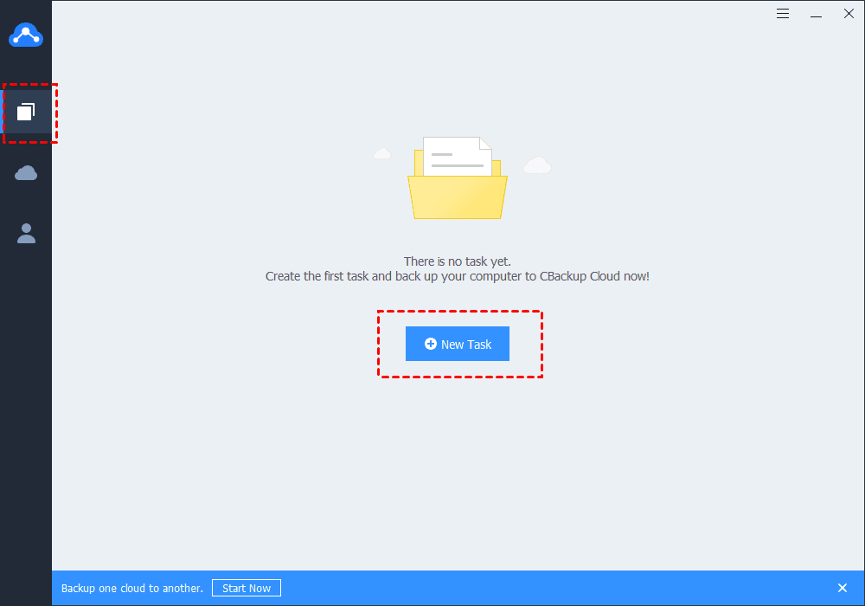
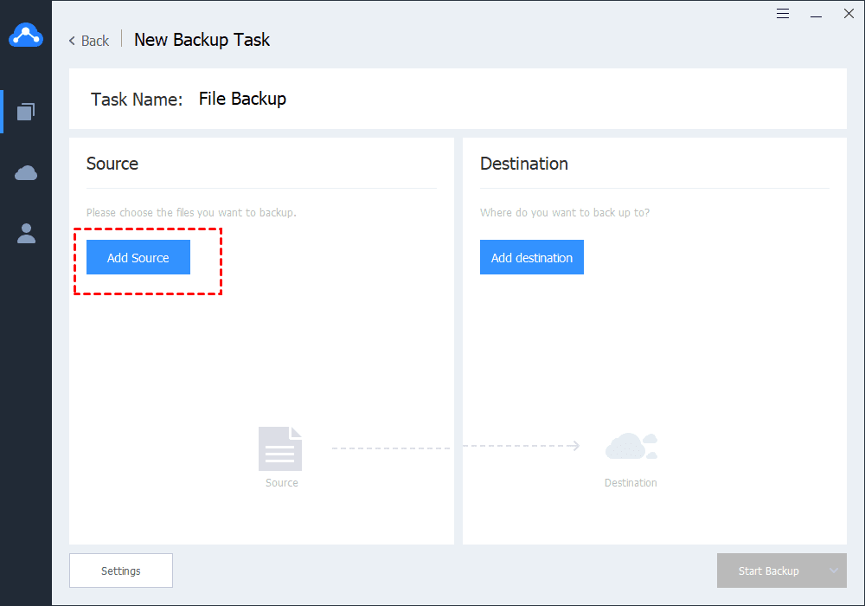
Step 3. Come back to the desktop app. Log in to your new account and you will go to the main interface of CBackup app and see three tabs on the left. Click the first one tab and click on the New Task button one by one.
Step 4. On the New Backup Task interface, you can click the pencil icon to modify the Task Name for distinguish.
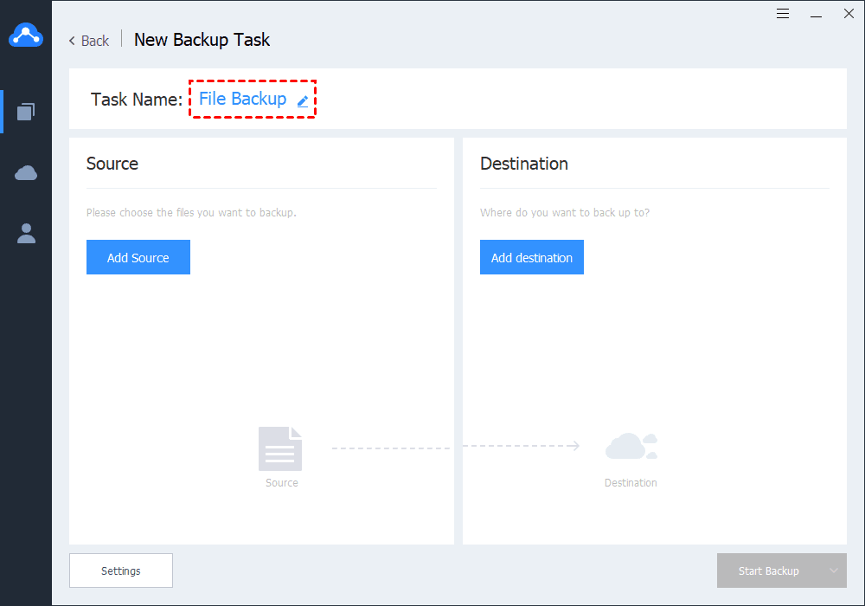
Step 5. Click the Add Source button and select the files that you want to back up to CBackup Cloud.
You can choose individual file or folder on a hard drive or entire computer as the backup source.
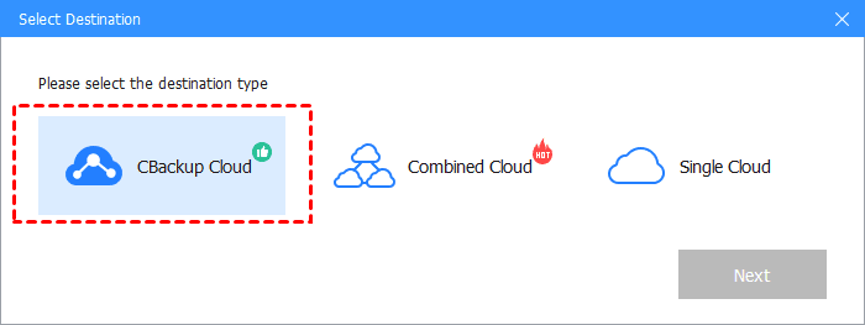
Step 6. Click the Add destination button and choose the CBackup Cloud after a new window pop up.

Step 7. There are many useful backup settings to improve your backup efficiency, you can click the Settings button to enjoy these features.
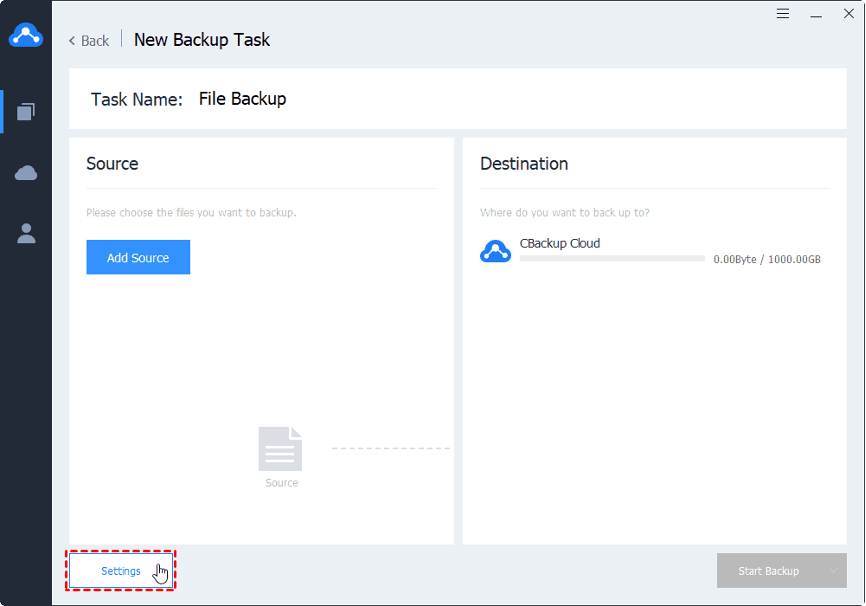
Scheduled Backup: You can use this feature to let CBackup back up your files at specific time, daily, weekly, monthly, etc. so that you can protect your data regularly.
File Filter: You can use this feature to exclude some unnecessary file types or choose only few types of files to back up.
Email Notification: You can enable this features to let CBackup inform you the backup results so that you don’t need to wait for the backup results in front of the computer.
Step 8. Click the Start Backup button to let CBackup execute your backup task.
Write in the end
This page introduced the benefits of backing up files to cloud, the difference between cloud storage and cloud backup service, and introduced one of the best cloud backup service in the market to you. Meanwhile, the step by step guide to back up files to CBackup Cloud is also offered to you. You can follow the steps to try CBackup now!